The hidden serial port on the Squeezebox Radio
The other week I wrote about trying to gain access to the bootloader on a Logitech Squeezebox Radio via its serial console. When tinkering with this kind of device, it’s useful to get access to a console for exploring and debugging. Devices like this often have a TTL serial interface you can tap into to access the console.
The Squeezebox Radio has a TTL serial interface that is relatively easily accessed via the battery connector. To use it, you’ll need:
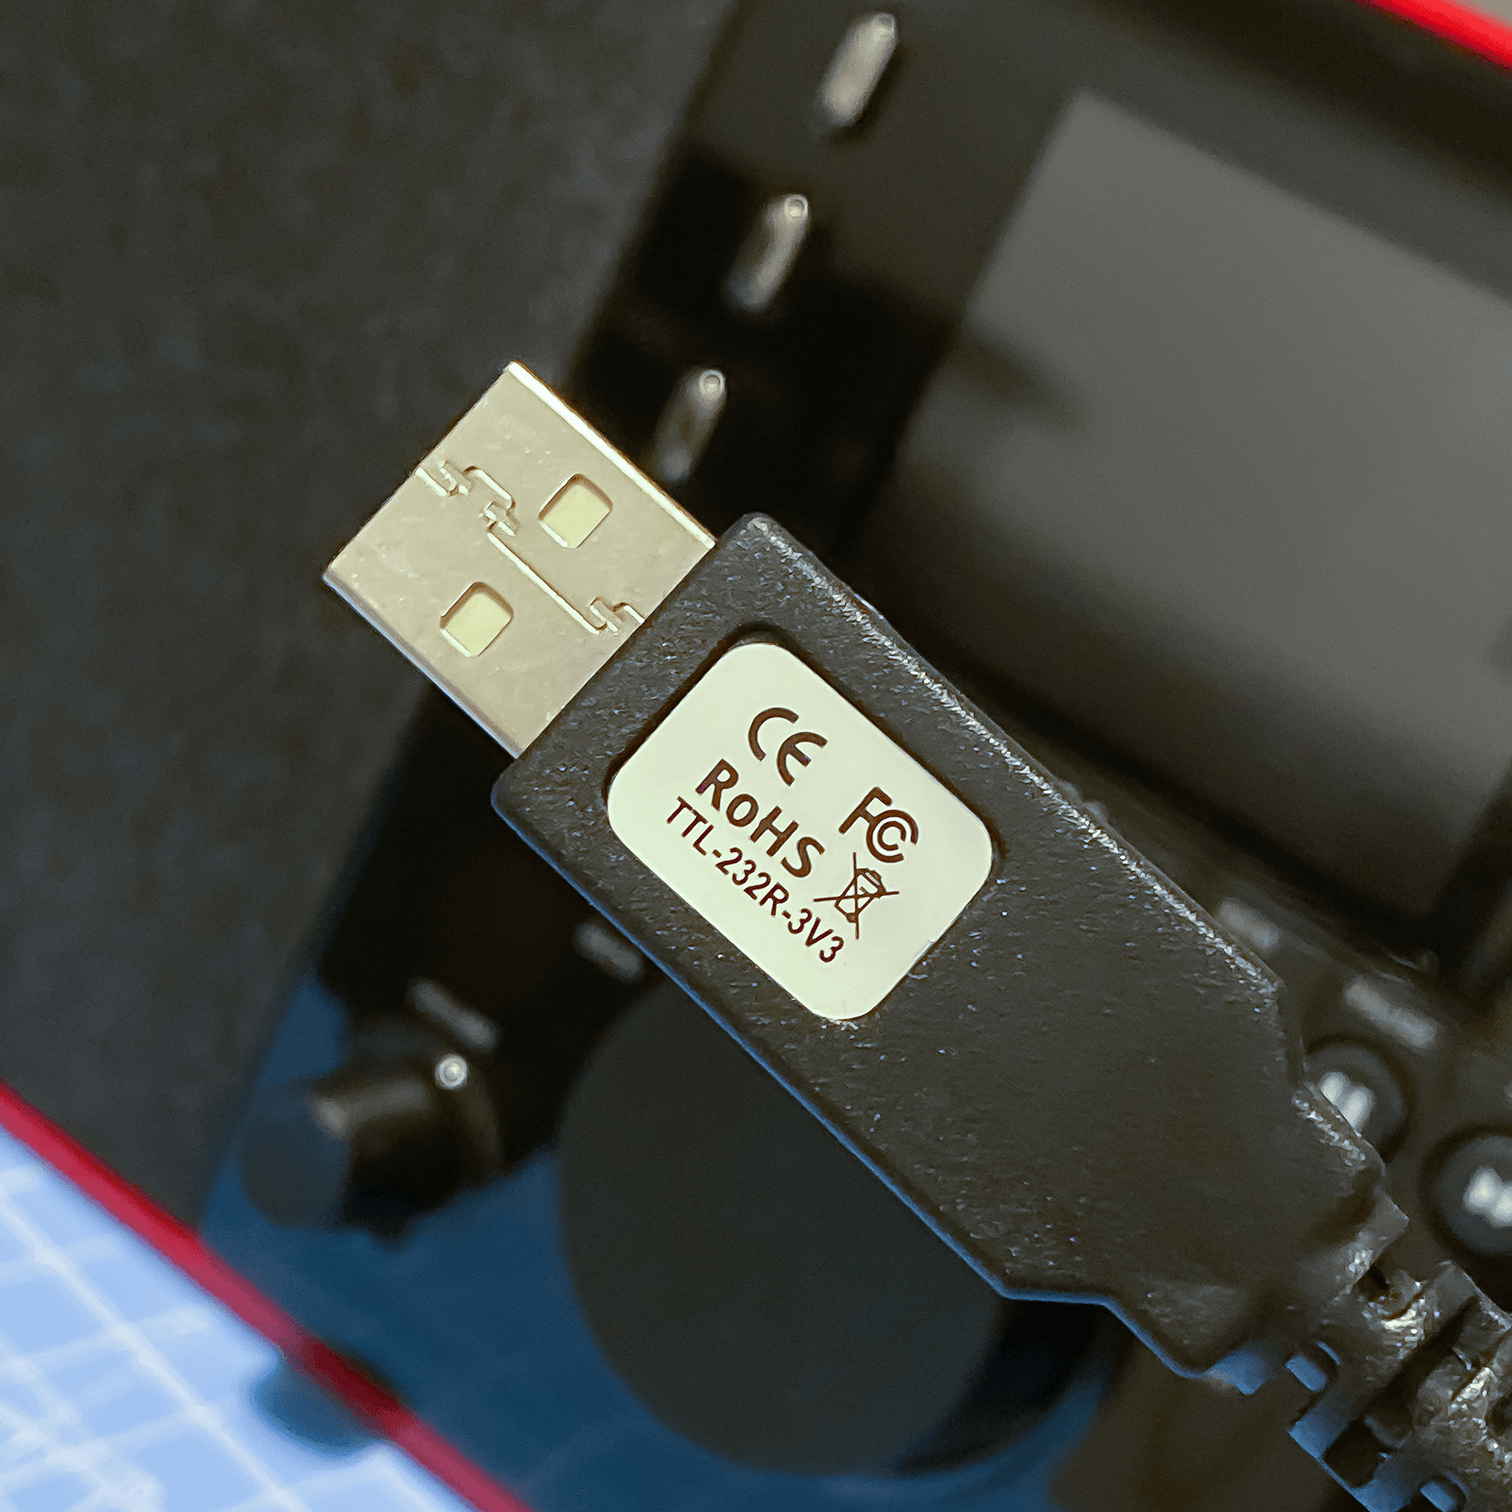
- A 3.3V USB-to-TTL adapter
- I’ve been using this FTDI TTL-232R-3V3 cable
- Be sure to use a 3.3 volt adapter; they’re also available in 5 volt versions which could damage the radio
- Jumper wires that can be attached between the SB Radio battery connector pins and the USB-to-TTL adapter
- Or can make up your own cable to fit the battery connector, more later
- Terminal emulator software
- A Linux system with the
screenutility will suffice
- A Linux system with the
- A large-ish flat-bladed screwdriver to open the battery compartment
Open up the Squeezebox Radio battery compartment on the underside of the unit and remove the battery if one is fitted. You’ll find a ten-pin connector inside.
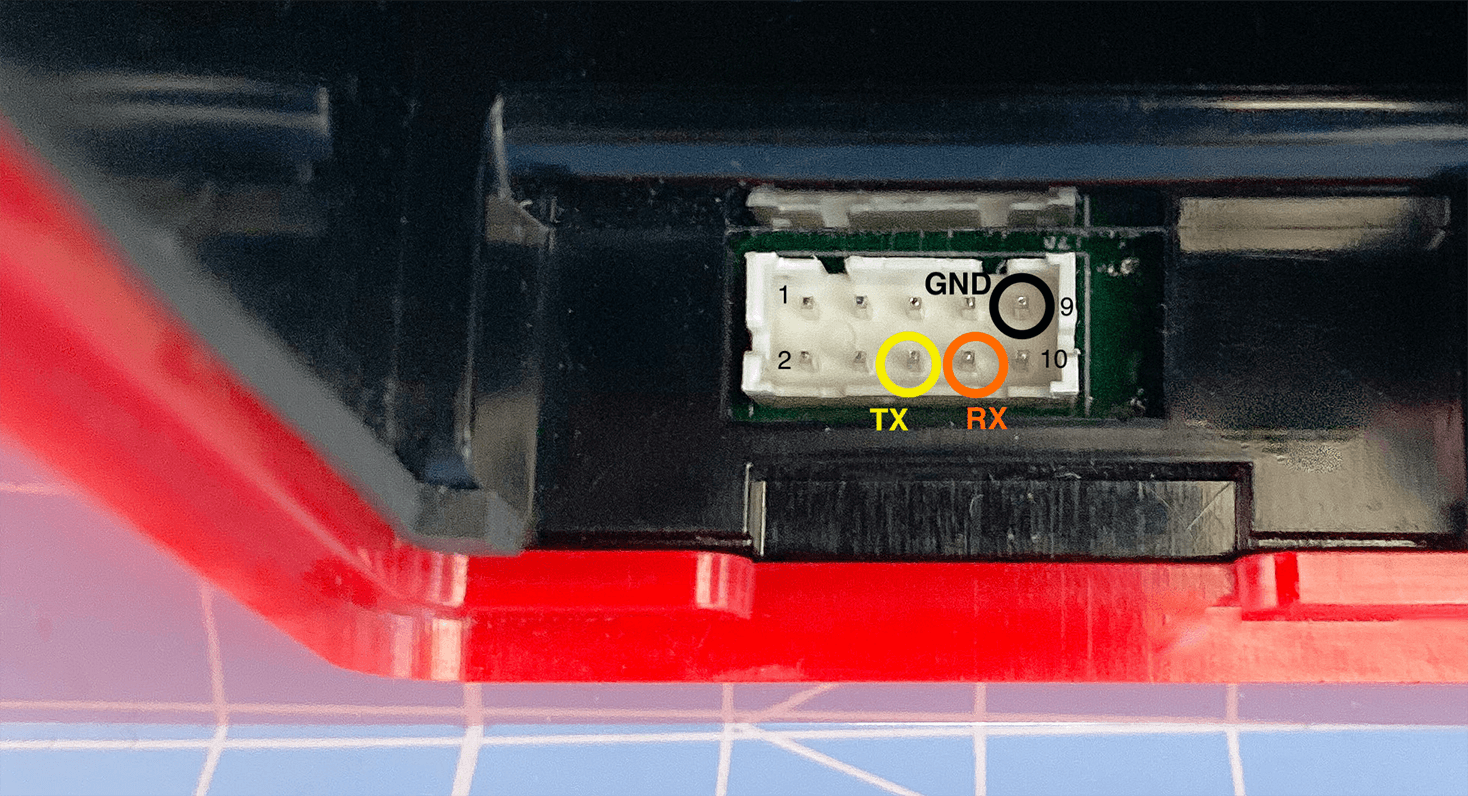
This connector exposes TTL RX, TX and GND pins as illustrated above.
| Pin No. | Description |
|---|---|
| 6 | TTL transmit (TX) |
| 8 | TTL receive (RX) |
| 9 | Ground (GND) |
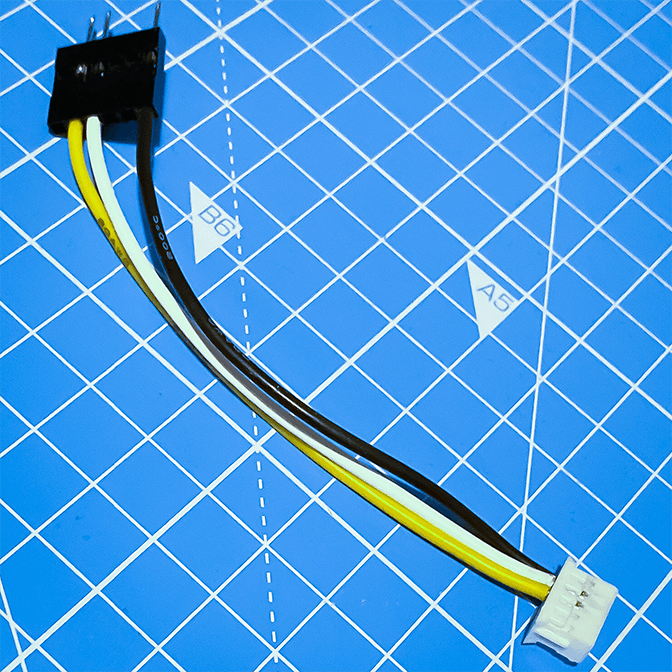
Use the jumper wires to connect the radio RX pin to the TX pin on the TTL adapter, the radio TX pin to the RX pin on the TTL adapter, and the radio ground to the TTL ground.
In the case of the FTDI TTL-232R-3V3 adapter, the connections are as follows:
| Radio Pin | FTDI Pin | FTDI Wire Colour |
|---|---|---|
| 6 (TX) | 5 (RX) | Yellow |
| 8 (RX) | 4 (TX) | Orange |
| 9 (GND) | 1 (GND) | Black |
I found that 2mm female jumper connectors on the radio’s battery connector were quite a tight fit. In the end, I made up a custom cable to make the process of hooking up to the battery connector much easier.
If you want to make up your own, you’ll need the following parts, plus a modicum of patience:
- Terminal crimp tool (see this kit)
- 2.54mm Dupont wire connector (minimum 5-way) and pins (to fit the USB-to-TTL adapter) (used the same kit as above)
- PHDR-10VS connector (to fit the battery connector)
- SPHD-002T-P0.5 female crimp terminal contacts (for the battery connector)
- Insulated wire
- I used 0.50mm2 (20AWG) wire, which is larger than you should apparently use for the SPHD-002T-P0.5 contacts, but I found that this made a more robust cable
The crimp tool in the kit linked above may not have been the quite the correct tool for the small contacts that fit the PHDR-10VS battery connector plug, but with care it seemed to work satisfactorily.
The tools I found that were supposedly designed for these small contacts were extremely expensive, costing hundreds of pounds, well beyond my budget for this project!
Once the physical wiring is complete, it’s time to connect the Radio up to your computer. I’ll be assuming that you’re using a Linux system.
Connect the USB-to-TTL adapter to your computer. You’ll need to find the ttyUSB device name. To do this, grep the kernel output.
$ dmesg | grep ttyUSB
...
FTDI USB Serial Device converter now attached to ttyUSB0
...
You’ll see something along the lines of FTDI USB Serial Device converter now attached to ttyUSB0, where ttyUSB0 is its device name.
The screen utility can then be used to establish a connection with the Squeezebox serial port. The radio uses a baud rate of 115200.
$ screen /dev/ttyUSB0 115200
Nothing will happen initially. Now power on the radio. Your screen should fill with the boot output from the device. That’s it - you’ve got a serial console on your Squeezebox Radio.
++NAND: RCSR=54200900
Searching for BBT table in the flash ...
.
Found version 1 Bbt0 at block 1023 (0x7fe0000)
Total bad blocks: 0
.FEC PHY: RTL8201EL
FEC: [ HALF_DUPLEX ] [ disconnected ] [ 10M bps ]:
Ethernet mxc_fec: MAC address <redacted>
No IP info for device!
Unrecognized chip: 0xf8!!!
hardware reset by POR

Clock input is 24 MHz
RedBoot(tm) bootstrap and debug environment [ROMRAM]
Non-certified release, version FSL 200904 - built 16:56:15, Jan  5 2012

Platform: Logitech Baby (i.MX25 )  PASS 1.0 [x32 DDR]
System type 2070 revision 7
Copyright (C) 2000, 2001, 2002, 2003, 2004 Red Hat, Inc.
Copyright (C) 2003, 2004, 2005, 2006 eCosCentric Limited
Once the radio has finished booting, you’ll see:
Starting SqueezePlay

Please press Enter to activate this console.
Squeezeplay 7.7.2 r9663
At this point, you can press the return/enter key and you’ll be at a root terminal.
One interesting (annoying) thing to note is that
Ctrl+Cwill not work in this terminal. So if you run a command which you’ll need to break out of (something as innocuous asping, for example), you’ll be stuck and need to reboot the radio.This is because there is no controlling terminal on the serial console, see here for more information.
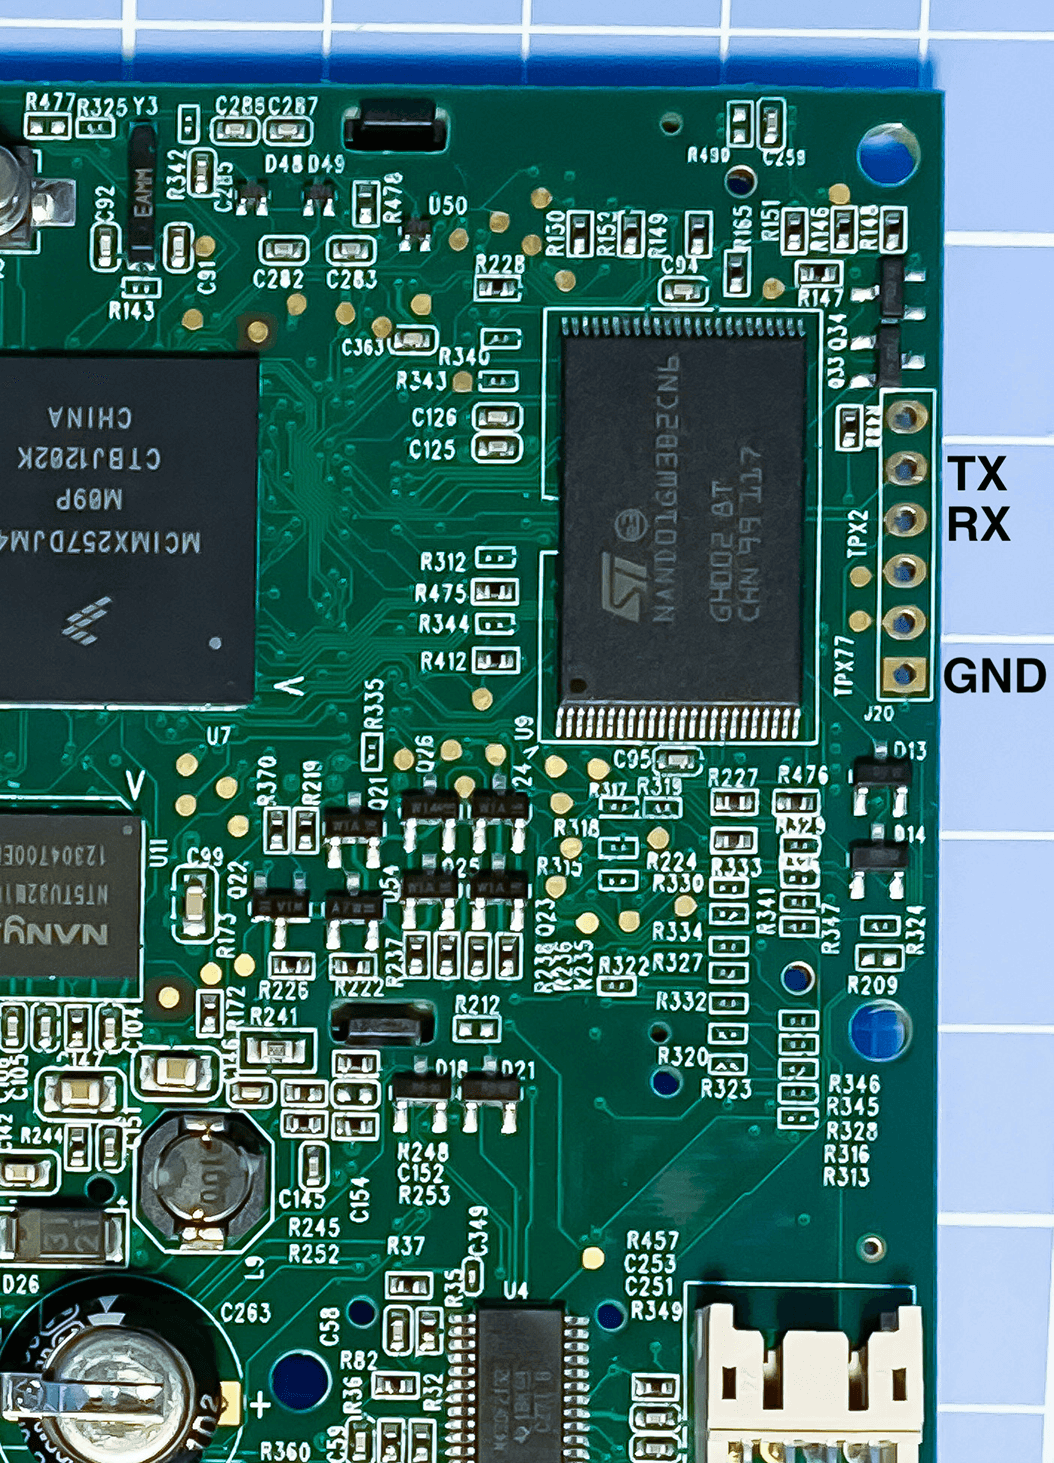
As a final note, the serial lines are also available on these pads on the board, if that’s useful to anyone.
References: