Creating a Windows 10 USB stick on a Mac
Creating a bootable Windows 10 USB stick is something I have to do only very occasionally. And every time I’ve forgotten how I did it last time. The process always feels like a right pain-in-the-proverbial, takes far too long and has a number of pitfalls, so I’m preserving these steps here for posterity.
So, you want to create a Windows 10 installer on USB on a Mac with just standard tools? Here’s how.
-
If you haven’t already, download the Windows 10 ISO from Microsoft
-
Verify the integrity of the downloaded ISO image; Microsoft rather handily now show you the SHA256 checksums once the ISO download has started
$ shasum -a256 ~/Downloads/Win10_2004_EnglishInternational_x64.iso -
Insert the USB stick you want to use, it should be at least 8GB in size; ensure it does not contain any data you want to keep as you’re about to lose it
-
From a Terminal, run
diskutil list; we need to discover the disk number associated with the USB stick$ diskutil list <...snip...> /dev/disk2 (external, physical): #: TYPE NAME SIZE IDENTIFIER 0: FDisk_partition_scheme *31.4 GB disk2 <...snip...>Look for a disk marked
(external, physical)and take notice of the size that’s reported. Make a note of thediskNthat corresponds to the USB drive (in the above example, this isdisk2).Important: Be sure you have the right
diskN; you could lose data if you run the subsequent commands against the wrong disk. -
Run the following command to partition the USB stick; replace
diskNwith the actual disk number noted in step 4.$ diskutil partitionDisk diskN 2 MBR FAT32 WIN10 2G ExFAT WIM RThis gives us two partitions on the USB stick: a small (2GB) partition containing a FAT32 filesystem, and a larger partition using the remaining space containing an ExFAT filesystem.
$ diskutil list <...snip...> /dev/disk2 (external, physical): #: TYPE NAME SIZE IDENTIFIER 0: FDisk_partition_scheme *31.4 GB disk2 1: DOS_FAT_32 WIN10 8.0 GB disk2s1 2: Windows_NTFS WIM 23.4 GB disk2s2diskutildisplaysWindows_NTFSeven though the second partition contains an ExFAT filesystem. It just so happens that NTFS and ExFAT use the same partition type identifier0x07. -
Locate the Windows 10 ISO in Finder; double-click on the ISO file to mount it
-
The ISO will be mounted at
/Volumes/CCCOMA_X64FRE_EN-GB_DV9or similar; usels -l /Volumes/to checkThe two USB stick partitions should also be mounted at
/Volumes/WIN10and/Volumes/WIM -
Copy the contents of the Windows 10 ISO, except
install.wimto the FAT32 partition on the USB stick$ rsync -av --progress --exclude="sources/install.wim" /Volumes/CCCOMA_X64FRE_EN-GB_DV9/ /Volumes/WIN10/ -
Copy
install.wimto the ExFAT partition on the USB stick$ mkdir /Volumes/WIM/sources $ rsync -av --progress /Volumes/CCCOMA_X64FRE_EN-GB_DV9/sources/install.wim /Volumes/WIM/sources/install.wim -
Eject the USB stick in Finder; you can also eject (unmount) the ISO
-
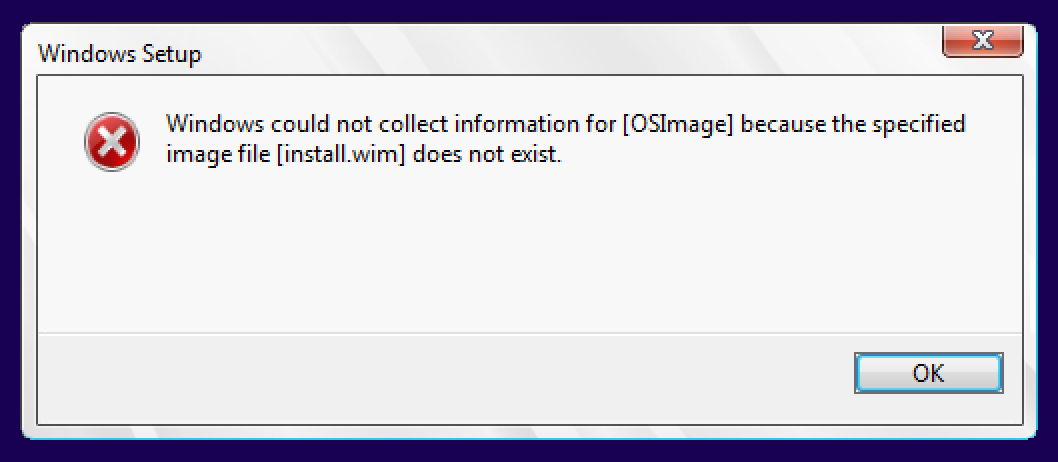
When using this USB drive to install Windows, booting from it and choosing the ‘Install now’ option will result in the following error; as a result, you’ll need to launch setup manually
-
After booting from this USB key, do not click the ‘Install now’ button; instead choose the ‘Repair my computer’ option
-
Select ‘Troubleshoot’, then ‘Command Prompt’
-
We need to find which drive letter the ExFAT filesystem on the USB stick has been assigned; run
diskpartand use thelist volcommand to find outX:\sources> diskpart <snip> DISKPART> list vol Volume ### Ltr Label Fs Type Size Status Info ---------- --- ----------- ----- ---------- ------- --------- -------- Volume 0 C WIN10 FAT32 Partition 2 GB Healthy Volume 1 D WIM exFAT Partition 6 GB Healthy -
Identify the drive letter corresponding to the ExFAT filesystem on the USB stick; this will be the volume with label
WIMIn the above example, this is drive letter
D -
Exit
diskpartDISKPART> exit X:\sources> -
Launch Windows setup with an
/InstallFrom:argument pointing to the location of theinstall.wimfile on the USB stick; replacedriveletterwith the drive letter you obtained fromdiskpartX:\sources> setup.exe /InstallFrom:driveletter:\sources\install.wim -
You’re done; complete Windows setup in the usual way.
So, there are a number of issues to contend with here, at least on many of the (admittedly aged) machines on which I’ve had to install Windows using a USB key:
- Many systems will only boot from USB storage configured with MBR (master boot record) and not GPT (at least on the some older EFI machines I’ve used)
- (Some?) systems will only boot from a FAT32 filesystem and not ExFAT
- FAT32 supports a maximum file size of 4GB but becent Windows 10 ISOs contain an
install.wimlarger than 4GB
To work around these issues, here we prepare with the USB stick with an MBR partition table and create two partitions on the USB stick: a 2GB FAT32 partition used to boot the system; and an ExFAT partition using the remaining space, which is capable of storing files of size 4GB and larger. We then copy the contents of the installation media, with the exception of install.wim to the FAT32 filesystem, and the install.wim file only to the ExFAT filesystem.
Bit of a pain, eh?